
Imagine stepping into a bathroom that feels like a personal sanctuary, a space where every tile, fixture, and light is exactly what you envisioned. That’s the promise of a well-planned bathroom remodel. Whether you’re dreaming of a sleek, modern retreat or a cozy, traditional haven, a bathroom renovation can transform one of the smallest yet most impactful rooms in your home. But where do you start? How do you ensure your project stays on track, within budget, and delivers the results you’ve been daydreaming about?
This guide is your definitive roadmap to bathroom remodeling success. We’ve distilled insights from top resources and added practical, real-world advice to create a checklist that’s both comprehensive and approachable. From planning your layout to choosing finishes and scheduling contractors, we’ll walk you through every step, anticipate your questions, and help you avoid common pitfalls. Whether you’re a first-time renovator or a seasoned DIYer, this guide will empower you to create a bathroom that’s functional, beautiful, and uniquely yours.
Why a Bathroom Remodel Checklist Matters
A bathroom remodel is like planning a cross-country road trip. You wouldn’t hit the road without a map, a budget for gas, and a plan for rest stops. Similarly, a successful remodel requires meticulous planning to avoid detours like budget overruns or delays. A checklist keeps you organized, ensures you’ve accounted for every detail, and helps you communicate effectively with contractors or suppliers. Plus, it’s a way to turn your vision into reality without the stress of unexpected surprises, like realizing your dream showerhead doesn’t fit your plumbing.
Our goal is to make this process feel less like a chore and more like an exciting journey. We’ve analyzed top resources (like those from experienced designers and professional contractors) to identify key steps and considerations, ensuring this guide covers everything you need to know. Let’s dive into the core phases of your bathroom remodel, starting with the foundation: planning.
The Planning Phase: Laying the Groundwork
Every successful bathroom remodel starts with a solid plan. This phase is your blueprint, assess your needs, define your goals, and set a clear budget. Are you aiming for better function, added home value, or a spa-like retreat?
Begin by identifying what’s working and what’s not. Maybe your layout feels cramped or lacks storage. One homeowner fixed a tight space by replacing a swing door with a pocket door, simple, effective, and non-invasive.
Next, set a realistic budget. Remodels typically range from $5,000 for basic updates to $10,000+ for major transformations. Don’t forget to include labor, materials, permits, and a buffer for surprises.
Finally, consider bringing in a pro. Designers can unlock creative, space-saving solutions, like reworking a closet to fit a double vanity or designing for accessibility without sacrificing style. Smart planning upfront saves time, money, and headaches down the line.
Designing the Perfect Layout
Your bathroom’s layout is key to both function and comfort. Start by assessing your space: Is the layout efficient? Does the door swing block fixtures? Is there enough storage? List your must-haves, like a walk-in shower or private toilet area, and compare them to your current setup.
Account for fixed elements like plumbing and windows. One homeowner worked around a skylight and large window by rotating the tub and adding a partition, achieving both privacy and a spacious shower without major plumbing changes.
Lighting is crucial too. Poor lighting can ruin the experience, as one renovator found when dim sconces left a guest bath unusable. Upgrading to brighter fixtures dramatically improved the space.
Feeling stuck? A bathroom designer can offer clever solutions, like using a pocket door or repositioning fixtures to open up the room. With expert input, even small changes can make your layout more efficient, spacious, and visually appealing.
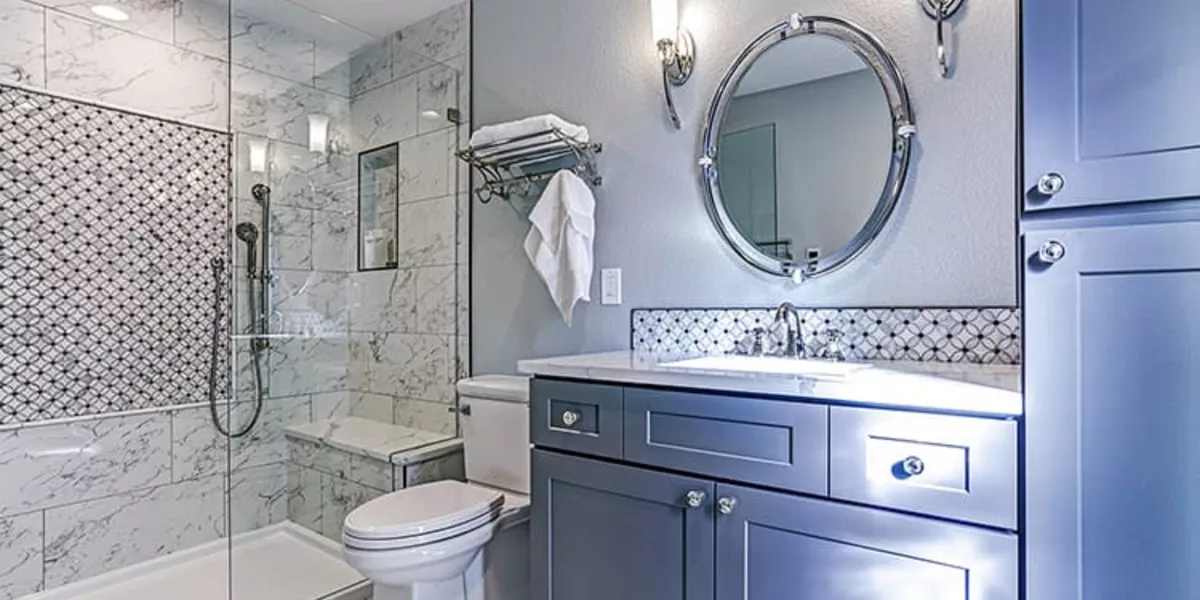
Choosing Finishes: Bringing Your Vision to Life
With your layout finalized, it’s time to bring your style to life through finishes. Think of them as the final brushstrokes that define the mood of your space. Start with a mood board, gather samples or images of tiles, fixtures, lighting, and colors that inspire you.
Aim for cohesion. Choose a palette and style that complement your home. For example, a modern farmhouse look might feature subway tiles, matte black fixtures, and a vintage mirror. One family kept costs down using classic subway tiles but added a black pencil tile for flair.
Prioritize quality in high-use areas like floors and countertops. Love marble but on a budget? Try porcelain look-alikes. Balance splurges (like a custom vanity) with savings elsewhere (like simple ceramic shower tiles).
Don’t overlook small details. Towel hooks, hardware, and mirrors add polish. One renovator scored a vintage brass towel rack at a thrift store, affordable and full of charm. Lay out your selections or use design tools to ensure everything works in harmony.
Building Your Renovation Checklist and Budget
Now it’s time to get practical. A detailed checklist and budget are your guardrails, keeping the project on track. Start by listing every item you’ll need, from big-ticket purchases like a bathtub to small essentials like caulk. Here’s a comprehensive checklist inspired by top resources, tailored to ensure you don’t miss a thing:
Building Materials and Contractors
Permit fees, demolition costs (like dump fees), electrical changes (wiring, heated flooring), plumbing (pipes, fittings), drywall, paint, caulk, waterproofing, and tile installation supplies (thin set, grout, spacers).
Electrical
Light fixtures, bathroom fan, underfloor heating, switches, and outlets (consider a vanity outlet for hair tools).
Bathtub
Tub, drain, spout, or freestanding filler with rough-ins.
Shower
Shower pan, drain, head, control valves, rough-ins, tiles, glass door, or curtain.
Vanity Area
Faucet, sink, vanity, hardware, countertop, mirror.
General
Flooring, toilet, wall treatments (shiplap, wallpaper), doors, baseboards, window treatments, decor, towel holders, toilet paper holder, door hardware.
Luxury Add-Ons
Electric heater, radiant heated floors, heated towel rack, frameless glass shower, smart mirror, or additional storage.
Estimate costs for each item, such as a basic toilet ($200–$500), custom counters ($1,000+). Get labor quotes early, especially for plumbing and electrical. One homeowner saved by reusing a vanity but paid a pro to install a tricky shower valve, avoiding costly leaks later.
If costs exceed your budget, revisit priorities. Swap luxury extras for smart alternatives, like choosing stylish yet affordable tiles. A well-planned checklist ensures smart decisions without compromising on quality.
Ordering Materials: Timing Is Everything
Once your plan and budget are set, order materials early to avoid delays. Custom items like vanities or specialty tiles can take 6–8 weeks to arrive, and contractors often need everything on-site to keep work moving smoothly.
Don’t overlook essentials like rough-in valves, each fixture brand requires specific components. One homeowner delayed their remodel by weeks after forgetting a matching valve for a new showerhead.
Plan for waterproofing, too. Systems like Kerdi protect against leaks and should be ready before demolition. For custom countertops, remember that templating happens after vanity installation, which can add 3–4 weeks to your schedule.
Stay organized with a spreadsheet to track orders, delivery dates, and costs. Label and store materials neatly, one DIYer used their garage and clear labels to keep everything accessible for contractors and avoid last-minute chaos.
Scheduling the Project: A Step-by-Step Timeline
A clear timeline keeps your remodel on track. Think of it as choreographing a dance, every step needs to happen in the right order. Here’s a logical sequence for most bathroom remodels, adaptable to your specific needs:
-
Demolition: Clear out old fixtures, tiles, and drywall. Rent a dumpster for debris.
-
Framing: Build new walls or partitions if needed.
-
Electrical and Plumbing Rough-Ins: Install wiring, outlets, and plumbing lines.
-
Drywall and Waterproofing: Hang drywall and apply waterproofing systems.
-
First Coat of Paint: Paint before installing fixtures to avoid splatter.
-
Vanity and Tub Installation: Install the vanity and tub (freestanding tubs may go in after flooring).
-
Tiling: Tile the shower, tub surround, and floor.
-
Countertop Templating and Installation: Template stone countertops after vanity installation.
-
Plumbing Fixtures: Install faucets, showerheads, and toilets.
-
Second Coat of Paint: Touch up after major installations.
-
Lighting and Hardware: Install fixtures, mirrors, and accessories.
-
Styling: Add decor, rugs, and window treatments.
For DIY projects, estimate how long each step will take based on your skills and availability. For example, tiling a shower might take a weekend for an experienced DIYer but longer for a beginner. If hiring contractors, align their schedules with material deliveries to avoid downtime. One renovator learned this lesson when their custom vanity arrived late, forcing their contractor to pause work for two weeks.
Anticipating Obstacles: Planning for the Unexpected
Every remodel has surprises, but anticipating obstacles can minimize stress. Ask yourself: Will the new tub fit through the door? Is the subfloor in good condition, or will it need replacement? Can existing wiring handle new lighting or heated floors? These questions, inspired by contractor insights, help you prepare.
For example, one homeowner discovered their subfloor was water-damaged during demolition, adding $1,000 to their budget for repairs. Another realized their dream frameless glass shower door required a custom order, delaying the project by a month. Checking these details early, by consulting with your contractor or measuring doorways, saves time and money.
Also, consider logistics. Will demolition dust affect other rooms? Sealing off doorways with plastic sheeting can help. Are inspections required? Schedule them early to avoid delays. By thinking through these scenarios, you’ll feel more confident tackling the project.
Getting Creative: Adding Unique Touches
Your bathroom remodel is the perfect time to infuse personality. Add texture with shiplap, beadboard, or bold wallpaper. One homeowner gave their powder room a boutique-hotel feel with floral wallpaper and a vintage mirror, stylish and budget-friendly.
Thrift stores and antique shops are great for standout finds, like salvaged cabinets or unique light fixtures. A brass sconce from a flea market, for instance, can make the space feel custom for less.
Don’t be afraid to go bold, try a colorful ceiling or playful penny tile floor. Tech upgrades like smart mirrors or heated towel racks add a touch of luxury, but plan ahead for cost and delivery times. The goal: make your bathroom feel truly yours.
Conclusion: Your Path to a Dream Bathroom
You’re now armed with a comprehensive bathroom remodeling checklist and guide to turn your vision into reality. Start by planning your layout and budget, then choose finishes that reflect your style. Order materials early, create a timeline, and anticipate obstacles to keep the project smooth. Whether you’re DIYing or hiring professionals, organization is key to avoiding surprises and staying within budget.
Ready to get started? Take a moment to sketch your dream layout or browse Pinterest for inspiration. If you’re feeling stuck, consult a designer or contractor for expert advice. Most importantly, enjoy the process, your new bathroom is a space you’ll use every day, so make it one you love. Share your progress on social media or bookmark this guide for reference as you bring your dream bathroom to life.